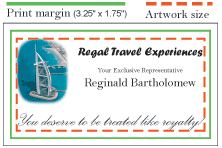
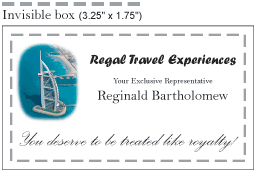
Here we have a Process Color business card, which is 3.5" x 2", that was created and saved as an EPS file (vector format). The print margin for this product is 3.25" x 1.75". However, as you can see, the actual size of the artwork is less than this:
If this image were uploaded to the system, it would be resized in order to fit the product's 3.25" x 1.75" print margin. This is probably not the desired effect:
In order to use vector artwork whose size is not that of the product's print margin, a properly-sized "bounding box" needs to be added to the EPS file. This can be accomplished with a tool like Adobe Illustrator. Alternatively, this would be done in whatever program the EPS file was created and saved from. For this example, we'll use Illustrator.
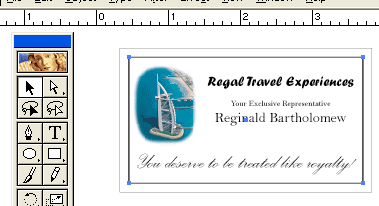
As shown here, we've drawn a box around the artwork which is 3.25" x 1.75", the size of the print margin (highlighted in blue):
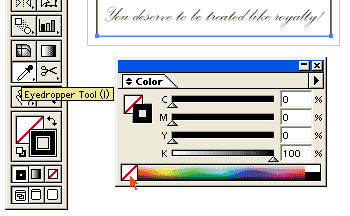
The last step is to make this new "bounding box" invisible, so it won't display in the artwork. With the bounding box that we've drawn still selected, we'll use the "Eyedropper" tool to select the "none" option from the Color palette. We want to make sure that both the fill and stroke for our box are set to "none":
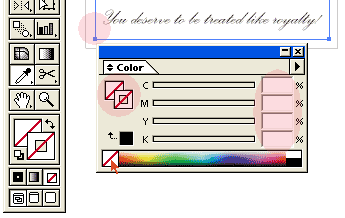
You can see the difference here. The values in the Color palette are empty, the Fill & Stroke indicators in the pallette indicate "none", and the box we've drawn now does not show a color in it, as well; only the "selection band" is displayed.
Afterwards, when uploaded, the artwork will retain its original size, now being constrained by the invisible bounding box:


